top of page


Set Up Guide: The RAMP Knee Positioning System
Surgical Videos
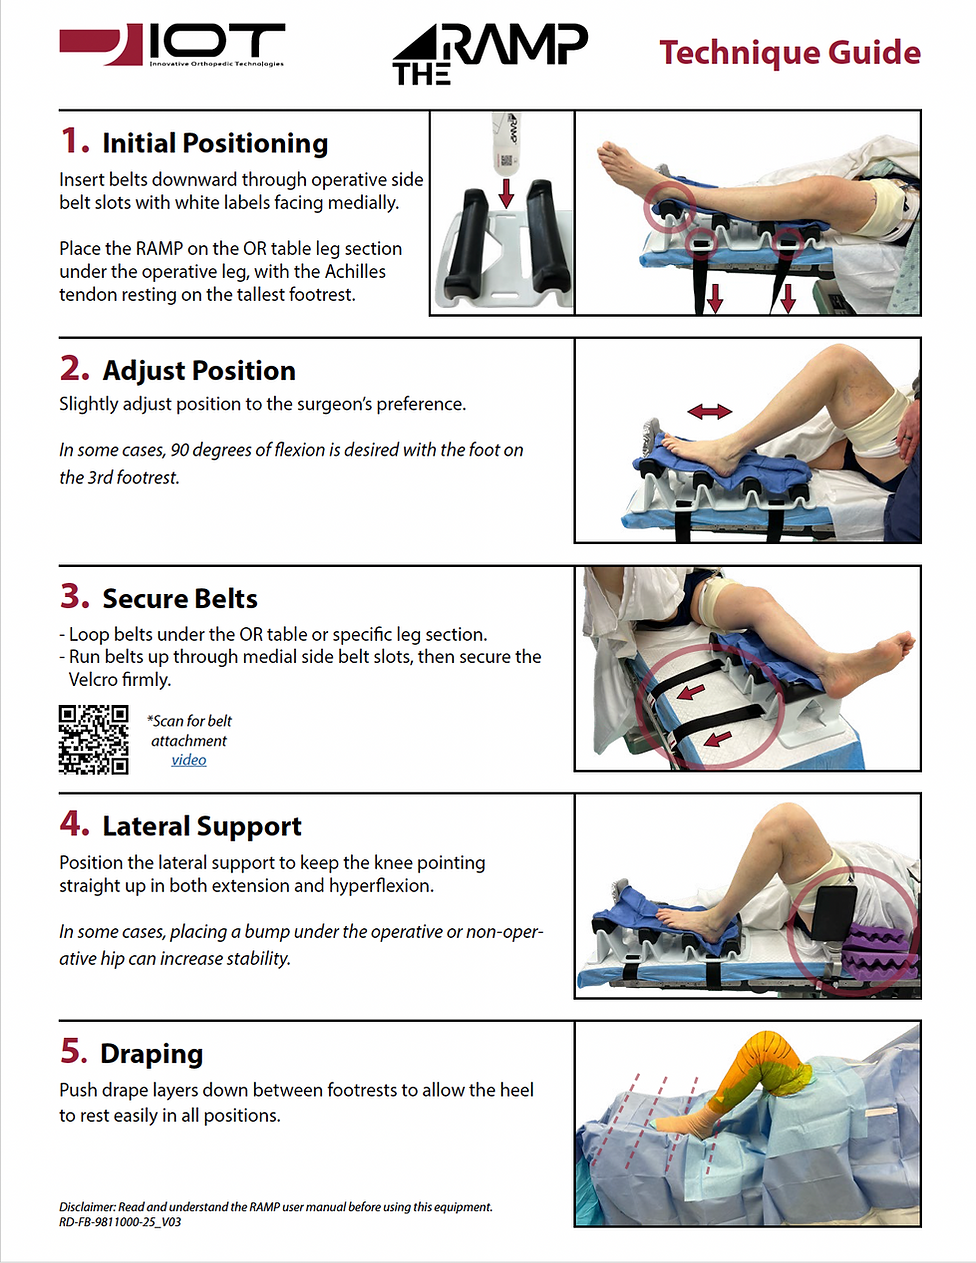
Belt Attachment
1. Insert belts downward through the lateral side belt slots with the labels facing medially.
2. Loop the belts underneath the OR table.
3. Run belts up through the medial side belt slots, then secure the Velcro firmly.

IOT STUDIO live
Draping Example
Anchor 1
bottom of page